Modifying an Idler Turntable
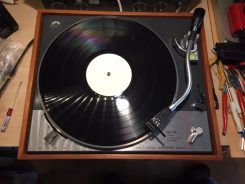
One of my activities is transferring archive music library master tapes to digital, so they can be made more widely available again. This is not always straightforward, and it’s sometimes necessary to transfer excerpts from disc if the master tape is damaged in some way. To do this requires a decent vinyl playback system. This article is about how I put one together.
Sometimes there are problems with the old tapes — such as oxide or backing shedding, and in particular when the backing binder becomes sticky and stops the tape passing through the machine. Another issue is the adhesive used in splicing tape becoming sticky (although it is specifically supposed not to) and this can result in oxide fragments being pulled off the front of a track resulting in dropouts. And unlike the solutions for sticky binder and shedding (such as baking the tape or running it through a white spirit or isopropyl alcohol-soaked pad) sticky splicing tape causing damage is difficult to avoid, even if winding very carefully.
On more than one occasion, problems like this, or major dropouts, tape damage and other issues, mean that a (usually short) section of the master tape is unrecoverable. The solution, then, is to try and find a copy of the library disc pressed from the master, capture the appropriate section, match it in level and other characteristics and then edit it into the version transferred from tape.
A better vinyl playback system
To do this effectively requires a decent record deck, and while the unit I’ve had for some time — a Numark TT-100, essentially a DJ turntable — does a good workmanlike job, and has the benefit of 78rpm (which is sometimes necessary) as well as 33 1/3 and 45, I though it worth spending a bit of time and money acquiring a superior vinyl playback system.
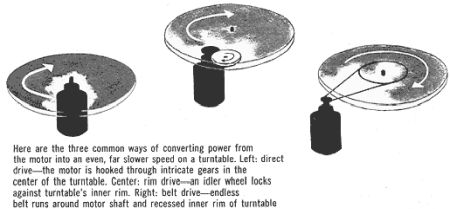
There are basically three types of ways in which the motor can drive the platter in a turntable: Idler Drive, Belt Drive and Direct Drive. They’re illustrated in the diagram above. It should be noted that there is often more than one way of implementing all three of these methods: Direct Drive — often found in DJ turntables — can involve the actual platter being part of the motor, rather than requiring the “intricate gears” suggested above; with Belt Drive the belt may go round the entire platter and not a sub-platter; and in the case of idler drive the idler may be horizontal (as shown — Garrard used this) or vertical (as in the Lenco designs).
The Lenco L75
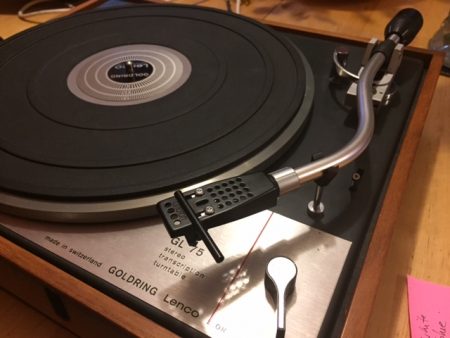
I decided on an idler design as these are highly-regarded for their sound quality. While it would have been nice to have, say, a Garrard 401 transcription turntable, this was well out of my price range and I settled instead for a Swiss-made Lenco L75. I found one for a good price and a relatively short drive to Norwich. I have never actually owned one of these before, though I remember one from the school music room, many years ago (they were common in educational institutions).
As soon as I got it home I reviewed it visually, and all looked good, so I powered it up and it ran fine, solidly at each speed. It had a rather cheap and nasty original plinth that (still) needs to be replaced with a proper, solid one. These decks perform best without the benefit of the springs provided supporting it in the plinth, so I removed them.
Updates: V‑blocks and wiring
Then I looked at the so-called “V‑blocks” in the arm suspension. NOTE that I didn’t use the original Lenco arm in the end, but this info may be helpful if you are. The arm has a knife-edge bearing that allows it to swing up and down. The knife edge, attached to the arm tube, rests in two V‑shaped blocks, one either side, and they are notorious for degrading. Sure enough, mine had decayed into solid lumps that looked like yellowed teeth. I carefully scraped them out, cleared the holes, and replaced them with a pair of “desmo” V‑blocks sourced from eBay. The whole operation was remarkably straightforward.
Next I reviewed the wiring. The audio cabling centres around a terminal block on the underside of the deck plate and here the wires from the tonearm headshell meet the shielded cables going to the outside world. The left and right signals and their respective ground leads need to by electrically separate from the chassis ground (a yellow wire also leading out of the plinth): in my case they were, but I replaced the coax with modern cable and the DIN plug on the end with two gold-plated phonos. The metal body of the arm is grounded to the chassis.
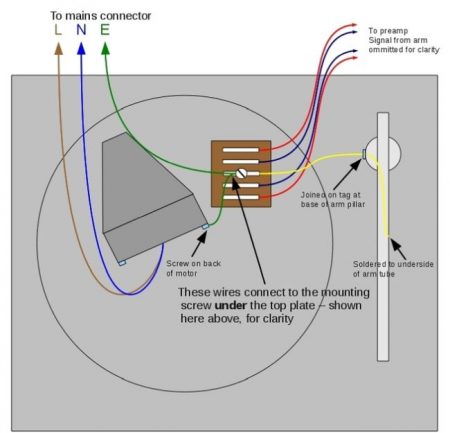
On the mains side, the circuit is simple: Live and Neutral come in, one leg goes via a switch to one side of the motor and the other side goes to the motor. This might have been fine 40 years ago but today, with old electrical systems, we probably want a better approach. The suggestion in the Lenco Heaven forum — where all the experts on the subject of these turntables hang out — is to follow the wiring shown below, drawn by Stephen Clifford:
Not shown above is the fact that the yellow (chassis ground) lead is extended out of the plinth to be connected to the appropriate connector on a phono preamp if required.
Impossible hum
Having carried out all the re-wiring, I installed a cartridge and ran it up. And it hummed, badly. Now you do not need the yellow lead connected to ground on the phono preamp and the ground connected in the mains plug as it will cause a hum loop, but in this case I could not get the hum to go away, whatever I did. I tried cleaning the headshell and arm contacts, different earthing schemes, different cartridges and even different preamps, but to no avail.
It seemed likely to me that the problem lay in the wiring to the headshell connector but this seemed fairly hard to address. In addition (and no doubt purists will hate me for saying so), I found the original arm rather clunky. So, even though I had carried out the task of replacing the V‑blocks et al, I decided to replace the tone arm.
The Ortofon AS-212 as a replacement arm
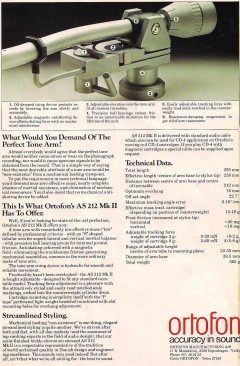 There are only a couple of tone arms that will slot more or less straight into a Lenco, ie they are the right length etc to fit. The one that appealed to me was an arm made by Danish manufacturer Ortofon (famed for their pickup cartridges) the AS-212. But where to find one? Hunting around netted me a gentleman in Germany selling a Telefunken S600 deck — these were fitted with this arm — at a good price.
Sadly, when it arrived, the rear of the arm had disappeared and the lid of the turntable was cracked — a result of the shipping company mis-delivering it and the erroneous recipients opening it.
Not only that, when I mentioned my intentions on a Facebook group I belong to specialising in vintage equipment, they were horrified. The Telefunken S600 was an excellent belt-drive deck, they said, probably out-performing the Thorens decks of the time, and should not be vandalised and left ‘armless’. So I decided to repair it, and see if I could find a spare AS-212 arm for the Lenco, then keep the one I preferred and sell the other. The Telefunken story is for another article.
Immediately up came an offer on the Vinyl Engine forum of a complete AS-212 arm, boxed: a replacement arm for a Telefunken. At the same time I received an offer of a replacement armtube, bearing and counterweight. I could use the former on the Lenco and the latter to repair the Telefunken.
Preparing the arm for fitting
The new-old-stock complete AS-212 assembly duly arrived, and I acquired a mounting base for the new arm to fit the Lenco deckplate hole — the Ortofon is a different diameter and thus needs a different fitting. These are available on eBay: I bought a silver-coloured one.
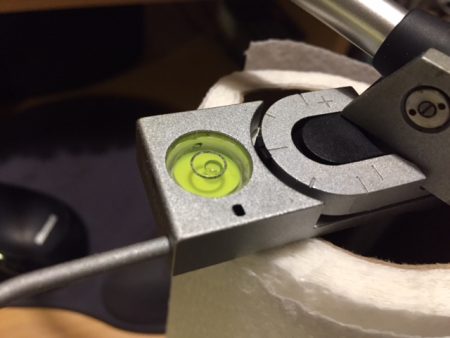
Before fitting to the Lenco, the new arm needed some dismantling. I decided to use the Lenco arm lifter — pretty much obligatory, in fact, with an AS-212 designed for an S600, as the Ortofon arm comes with an oil-damped lifting cylinder with just a bottom pin that is supposed to fit into the S600 lifter mechanism, a clever Bowden-style cable arrangement: thus it does not include a complete lifter system. So I removed the lifter cylinder and arm rest, leaving a 10mm hole in the body of the arm, which I decided to fill with a suitably-sized circular bubble spirit-level, secured with the existing set-screw. Adjacent to it in this picture is the AS-212’s natty no-contact magnetic anti-skate system. The little hole formerly took a pin on the lifter to stop it rotating. I found a use for it later.
I also removed the arm clip from the AS-212 (the rod to the left of the above image is the back of it) so as to use the Lenco one, which is the correct diameter to hold the arm securely.
Next step was to mount the arm column in the new base. This was easily done. I set the height up by attaching a cartridge and adjusting the height so that the arm was horizontal with the stylus resting on a disc. I lined up the body of the arm to be parallel to the edge of the deck-plate and it looked great. I tightened the set-screw and there it was.
A few modifications
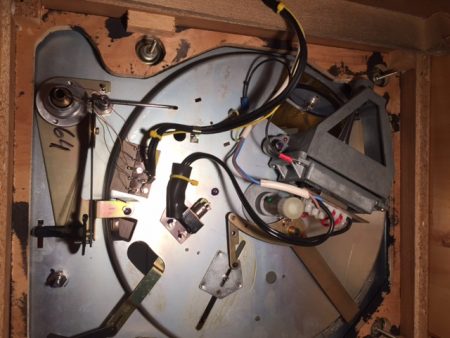
An initial problem was that the arm wiring was not as long as the original Lenco, so I moved the audio connection tag strip to somewhere nearer to the arm so it reached, and under the deck plate instead of on top.
This picture also shows the revised power wiring mentioned earlier. I made a new hole in the plinth for the audio cables to exit so that they didn’t run parallel to the power cable.
The Lenco lifter actuator lever is quite long, and actually fouled the arm when at rest, so I shortened it. Actually, I was going to bend it outwards but the top bit snapped off. Ooops. It’s still easy to reach and use: a short piece of black heatshrink tubing and it looks the same as the original, but shorter.
The biggest challenge was getting the lifter to work. The Lenco lifter arm is quite deep, and when lowered rested on the top of the Ortofon platform long before the stylus was able to reach the record. I thought this could be solved simply by shortening the lifter arm to avoid the edge of the platform, but this was a Bad Idea as the arm could drop down and hit the deck plate between rest and the start of a disc, and tended to fall off the end of the lifter. The solution instead was to file the underside of the end of the lifter arm where it overhung the platform to about half its depth. This allowed the lifter to drop far enough to allow the stylus to reach the record. All the elements of the arm are able to be adjusted for height: the lifter arm, the arm rest, and of course the arm column.
It’s worth noting that there is a small caveat here. The Lenco arm rest, which I’m using, allows the arm to be unclipped by moving it vertically. It is possible, once unclipped, for the arm to swing outward, whereupon it will fall off the lifter arm and could drop down and clout the cartridge on the power switch or the deck plate itself. I made this impossible by inserting a thin rod into a hole left by part of the original AS-212 lifter mechanism and bending it over and above the arm to stop this from happening. You can see the hole in the close-up of the bubble level a couple of images up. While I was at it, I added a cut-down self-adhesive foot to the right-hand front of the platform so that the arm couldn’t drop if it went backwards. Another approach would have been to reinstall the Ortofon arm clip, which opens towards the turntable and is thus less likely to allow the arm to go backwards. However this would require removing the Lenco arm-rest, leaving a hole in the deck plate.
Next I needed to mount the cartridge more accurately. The AS-212 needs a 16mm overhang — ie if you swing the arm across to be over the central spindle, the stylus should be 16mm to the left of its centre. This proved to be quite difficult to do: the slots in the headshell only just allowed it with the cartridge as far back as it would go. But it worked, and I was also able to set up the null points successfully with a protractor, with the cartridge parallel to the groove at both points. The correct way of fitting the cartridge is to use the two threaded rods on the underside of the manual lifter prong, but in my case, although I have several Ortofon headshells, none of them would actually hold the Shure M97xE, either because they were too long, too short or there wasn’t room for the nuts. So I mounted the cartridge with a pair of bolts and fitted the manual lifter separately (see below).
Playing some records
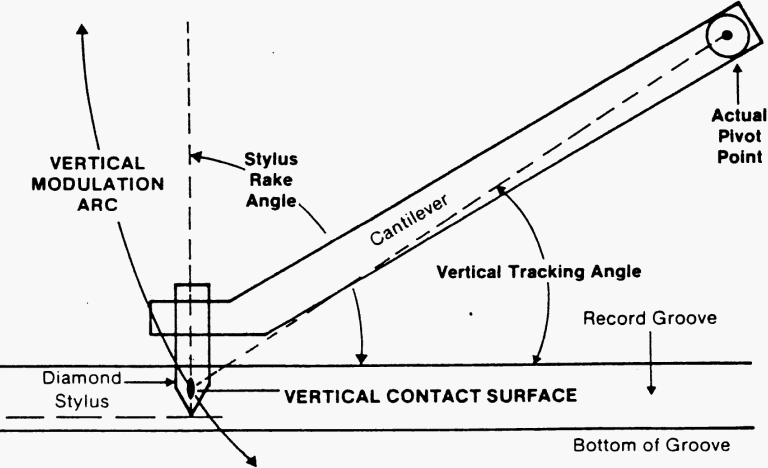 With that done, I carried out a final check of the settings, including: checking that the arm really was horizontal while playing and thus the Stylus Rake Angle was correct (I think this is a better way of looking at it than by addressing the Vertical Tracking Angle, and I don’t have a microscope); setting up the tracking weight for my Shure M97xE; and adjusting the AS-212’s elegant magnetic anti-skating setting.
And then I played a record for the first time — but not a terribly exciting one. It was the B‑side of a KPM Music Library test pressing of pieces by Richard Harvey, consisting solely of a 1kHz tone. I was able to listen to the tone quality at various points across the disc and was very pleased with how pure the tone was at all points.
Then to play some actual music: the content side of the same disc. I was immediately very impressed with the wide frequency range apparent on playback, and a good tight feeling to the bass end. The overall sound was very clear, clean and detailed, and the stereo imaging nice and stable. Excellent.
My view is that this is an exceptional combination of arm and deck and I am very pleased with the results so far, though I need to give it a lot more critical listens. But in theory, all that’s needed now is a new plinth that does the deck justice.
I have, incidentally, kept all the Lenco bits I’ve removed, included spares of items I modified (eg the lifter actuator lever and the lifter arm) so that if it ever needs to be restored to its original spec, this can be done.

